
 Making a box joint jig, also known as a finger joint jig can turn an average router into a woodworking production machine and this woodworking jig is easy to make out of 3/4" birch veneer plywood. You only need a piece of scrap plywood about 12" wide and 24" long. This shop made jig is clamped to a workbench and perfect for making beautiful boxes such as a trinket box, shadow box, jewelry box, etc.
You could choose to make this woodworking jig out of 3/4" MDF (medium density fiberboard) but I would not recommend it, because MDF doesn't hold screws as well as plywood. This will effect the attachment of the router base.
However, one could attach the router base with a through bolt (when using MDF) that is counter sunk into the work surface of the jig.
Start by making dado cuts 1/4" deep by 3/4" wide and 2" in from the 24" edges. These two dado cuts will be tracks for the fence to slide over the router bit. It's best to use dado blades on a table saw but a router with a 3/4" straight bit and a straight edge will work.
Next, cut 8" off of the 12" by 24" plywood (making two pieces), one 8" and the other about 16". The 8" piece forms the top of the box joint jig and the other (16" piece) forms the base, on which the router will be attached.
Cut another 1/4" x 3/4" dado 4" in from the front edge of the upper portion of the jig (8" piece). Make this dado cut perpendicular (90 degrees) to and on the opposite face of the first two dadoes. The fence, which holds or backs up the stock, will go into this dado. Run a couple of screws from underneath to hold the fence in its position.
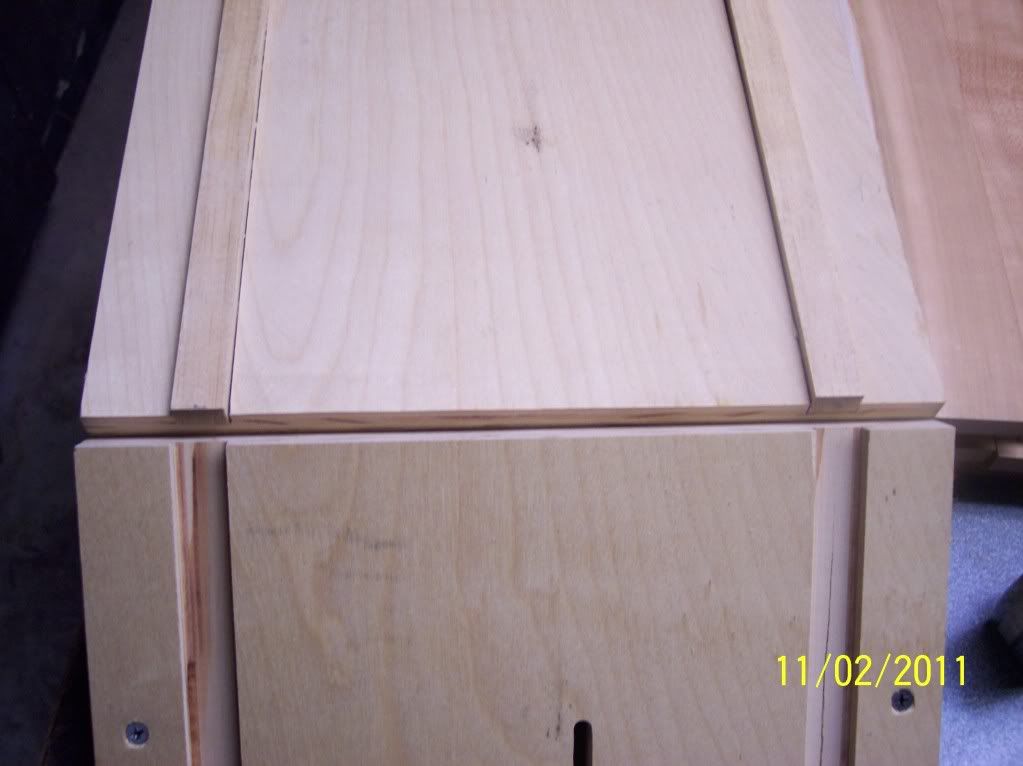 Next, glue and clamp 1/2" by 3/4" clear pine (parting stop) into the two dado groves of the base part of the woodworking jig. The upper part of the jig will glide along these tracks.
Cutting the dado slots as described in the first step assures perfect alignment between the tracks on the base of the jig and the groves in the upper part of the jig.
Note: You can choose to install the 1/2" by 3/4" clear pine pieces into the dadoes cut in the upper part of the jig, instead of the lower part, it makes no difference. On the other hand, less clear pine is required if you choose to put the tracks on the upper part of the finger joint jig.
Drill a hole in the base part of the jig close to the center and large enough so that the collet of the router clears the hole (more or less 1 & 1/4" dia.).
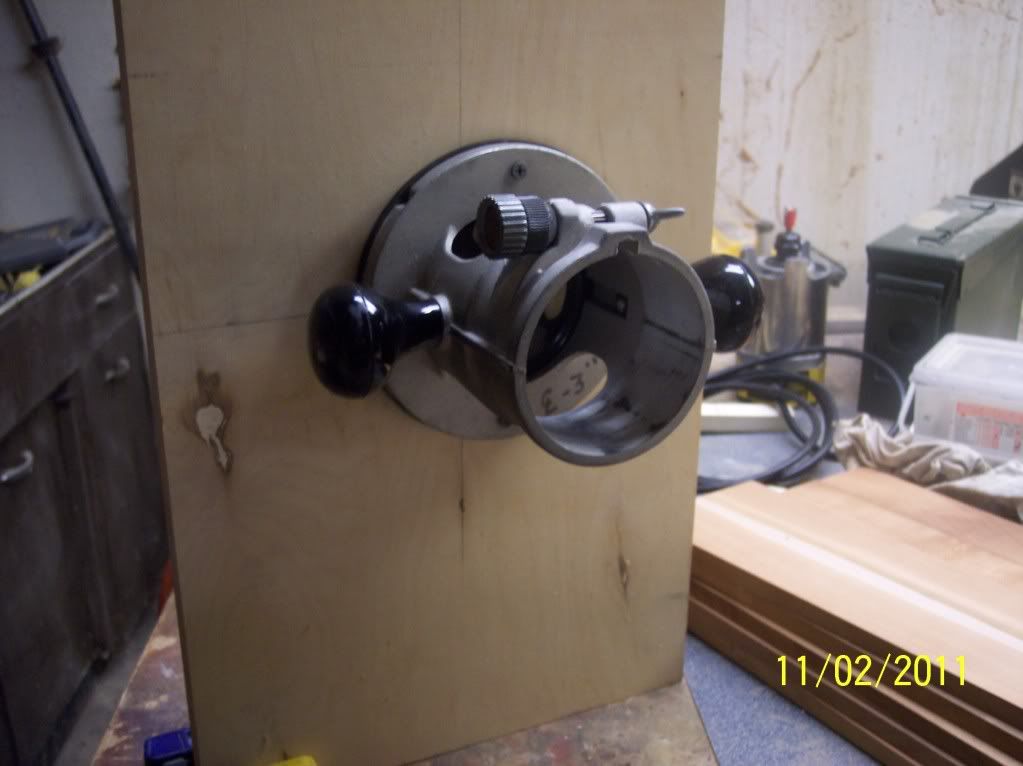 Attach the router base to the underside of the lower unit of the box joint jig. Center the router base on the hole drilled previously. I use a course threaded drywall screw (1 & 1/4") but you should use whatever means you see fit to firmly attach the router base.
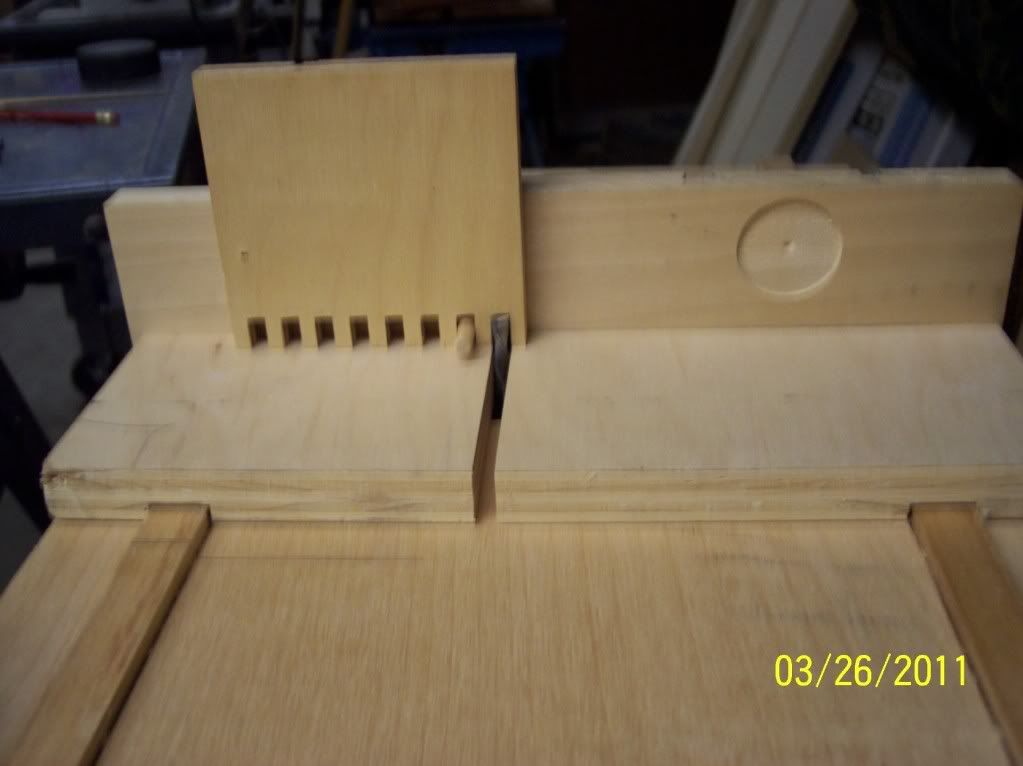
With the bit used to cut the box joints in the router (1/4" carbide spiral router bit in this example), put the upper part of the jig on the tracks and position it so that the spiral cutter (when raised), will cut into an area slightly ahead of the fence. Turn on the router and make the cuts in small increments. By that I mean raising the bit slightly as you slide the upper part of the jig back and forth until the bit cuts through the surface. This cut should stop just beyond the work face of the fence, about the distance equal to the diameter of the router bit.
Use a guide pin equal to the diameter of the cutting bit (1/4" dowel rod is used in this particular jig) is glued into a 1/4" hole, which is offset so that there is 1/4" between the cutter's edge and the guide pin's edge. I drill this hole about 3/8" above the bottom edge of the fence so as not to trap sawdust between the router bit and guide pin.
Configure the jig by cutting test pieces. Cut box joints into two test pieces, if the finger joints are too tight, than you'll have to loosen the screws attaching the fence to the upper portion of the jig. Nudge the fence slightly toward the cutter and install screws in a new location to hold the fence in position. Move the fence away from the router bit if the joints are loose.
Using the Shop Made Box Joint Jig to Cut Finger Joints
Now that your box joint jig is tweaked and if you haven't already done so, prepare your stock. The stock should be in width, a multiple of 1/4". This will make the top and bottom box joint somewhat equal. In this example, we'll index all the cuts from the bottom, start by cutting joints in the sides and then the front and back pieces of our box.
I start by setting the height of the spiral cutter to slightly more than the thickness of the material. In this way the fingers will protrude slightly past the outside face of the box and can then be sanded flush.
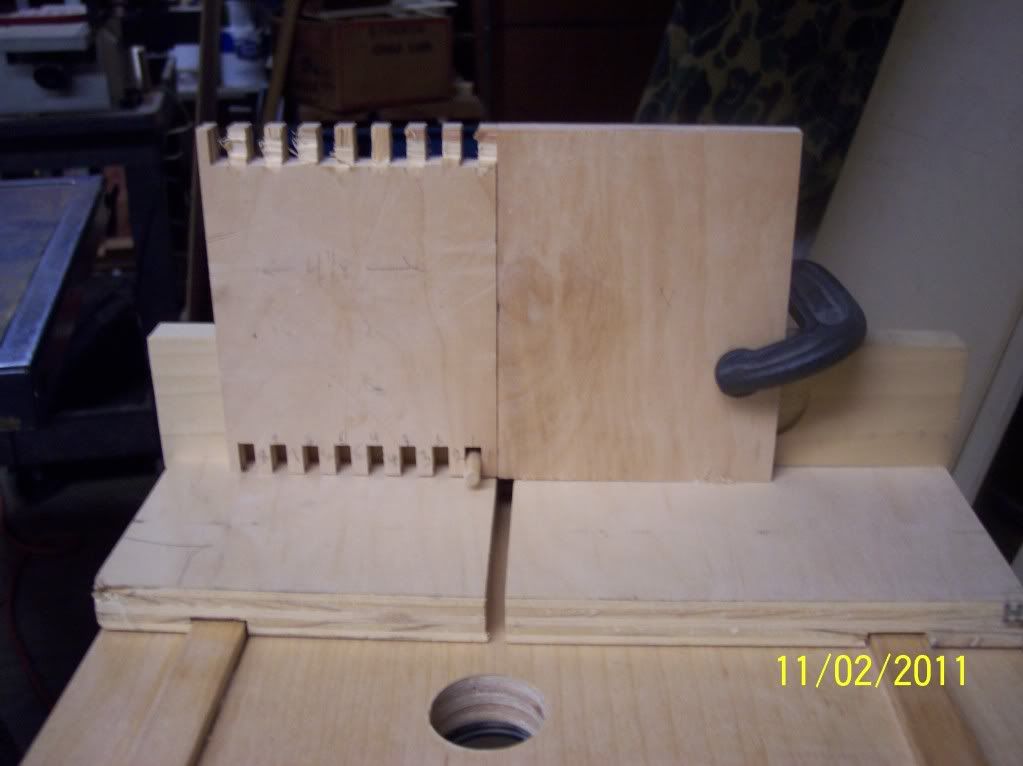
Put the bottom edge of the sidepiece against the guide pin, holding the work piece tight against the fence (this helps to prevent tear-out). Slide the platform slowly forward until the router bit has cut through the stock, let the router bit do the cutting. Don't force it.
After the bit has cut through, lift the work piece up and slide the platform back to its starting point. Then place the newly cut 1/4" notch over the guide pin to position the piece for the next cut. Repeat this process until the finger joints are cut for both sides and both ends of the sidepieces.
 To cut corresponding finger joints on the front and back pieces, place the first notch of a side piece over the guide pin (bottom edge facing toward the router bit), this will place a 1/4" finger on the cutting side of the guide pin.
 Next, place the bottom edge of the front piece against the bottom edge of a sidepiece and clamp the front piece to the fence. This will position the front piece correctly for cutting the bottom notch to correspond with the bottom finger on the sidepiece. Remove the sidepiece before cutting the first notch in the front piece, which is clamped in position. Then for the next cut, simply slide the front piece against the guide pin so as the notch is directly above the guide pin.
Once the first finger is cut on the front piece, the process is the same as was cutting the finger joints in the sidepieces. Repeat this process until all finger joints are cut for the front and back pieces of the box.
Now that you have a shop made box joint jig that cost you almost nothing except for an hour or so of your time, cutting perfect finger joints is practically an automated process. Use this technique and start building beautiful boxes fast and easy. Here is a great resource for box making projects, in case you're looking for more ideas.
Store Bought Jig for Box Joints
 |
| Incra-1 Box Jig |
My philosophy on buying tools for the shop has always been... "If it can pay for itself then the investment is worthwhile." You may have noticed that there are links to Amazon's site in this post, they're here for your benefit. I receive no compensation if or when you do decide to buy something from Amazon.
This jig is a new product that allows the woodworker to use two different techniques when cutting finger joints. One being similar to the technique described above using a router and the other technique involves the table saw, cutting the joint with dado blades.
As mentioned earlier, this box jig is new, so there are not many reviews but the ones I have read are positive.
Relevant woodworking jig information:
- Woodworking jigs are necessary tools in the wood shop
- Cut perfect circles and ovals using a router circle cutting jig
- Door hinge mortise jig, the door replacement tool
- How to use a pocket screw jig
Tweet

Easily Boost Your ClickBank Banner Commissions And Traffic
ReplyDeleteBannerizer made it easy for you to promote ClickBank products using banners, simply visit Bannerizer, and grab the banner codes for your favorite ClickBank products or use the Universal ClickBank Banner Rotator to promote all of the ClickBank products.